Monday, October 15, 2012

Tarte Fine Au Citron (Lemon Tart) Recipe

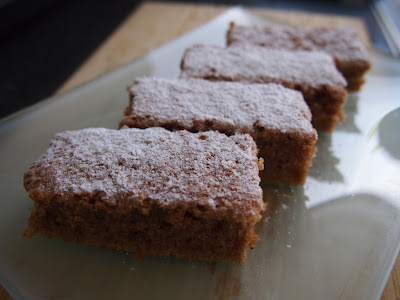
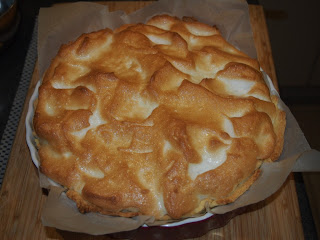
Tarte Fine Au Citron or lemon tart is a classic french dessert. Using my favourite pastry, Pate Sablee, the result is a smooth lemon filling inside a light but tasty tart case. As a variation, a meringue top can be added.


Tarte Fine Au Citron (Lemon Tart)

INGREDIENTS:
350g Pate Sablee (recipe can be found here)
5 eggs
180g caster sugar
150ml cream
zest and juice of 2 lemons
1 egg yolk mixed with 1 tsp milk, for glazing

METHOD:
Roll pastry out to 3-4 mm thick.
Line a lightly buttered, 22cm tart tin or 4 x tartlet tins with the pastry.
Refridgerate for 20 minutes.
Preheat oven to 190 degrees celcius.
Lightly whisk eggs and sugar in a chilled bowl - do not let the mixture turn pale.
Add lemon zest and juice. Stir briefly then cover with cling film and refridgerate.
Bake 'blind' the pastry for 15 minutes.
Remove baking blind material and leave for a couple of minutes then brush the base and sides with egg glaze.
Bake for 5 minutes; remove from oven then turn temperature down to 150 degrees celcius.
Lightly whish chilled lemon mixture.
Pour into tart case(s).
Bake immediately for 1 hour until lightly set.
Leave for 5 minutes before carefully removing the tart(s) from the tin.
Leave to cool on wire rack for at least 4 hours before serving.


TIPS:
- Serve the tart as is, sprinkled with icing sugar and/or accompanied by berries.
- After an hour of baking, a meringue top can be added then baked until lightly golden.
- The tart improves with time and can be made a day in advance but keep it in a cool place and not in the fridge to prevent the pastry from going soggy.

Enjoy!

Just desserts here 

Wednesday, October 3, 2012

Chocolate Fudge Cookies Recipe (LF)

Chocolate Fudge Cookies are soft, chewy and delicous! Perfect to satisfy most sweet tooths. With dried fruit bits and chocolate chunks every mouthful contains a pleasant surprise. Bonus is, this recipe can be made lactose-free by ensuring lactose-free chocolate and margarine are used. Make them and eat them fast because they definitely won't last!

Chocolate Fudge Cookie Stack!
INGREDIENTS:
125g margarine
1 tsp vanilla essence
275g brown sugar
1 egg
1 cup flour
1/4 cup self-raising flour
1 tsp baking soda
30g cocoa powder
1/2 cup sultanas
1/2 cup diced dried apricots
1/2 cup dried cranberries
1/2 cup dark chocolate chips
1/2 cup dark chocolate melts

METHOD:

Preheat oven to 180 degrees celcius and line 2 baking trays with baking paper.
Beat margarine, sugar, vanilla and egg in a bowl until smooth
Sift flours, baking soda and cocoa into the mixture.
Stir mixture together then add fruit and chocolate.
Put round spoonfuls of mixture onto the trays about 4cm apart; gently pressing each one flat.
Bake for 10 minutes.
Stand cookies for 5 minutes to cool before transfering to a wire rack to cool completely.


TIPS:
 - Try to leave ample space around each cookie when placed onto the tray because as they cook in the oven, they will spread out quite generously.
- It is quite a sticky mixture and can be difficult to drop portions onto the trays. I use two tablespoons, one to scoop and drop and the other to scrap it off.

Enjoy!

Just desserts here 

Thursday, September 27, 2012

Apricot, Sour Cream & Coconut Cupcakes Recipe

Apricot, Sour Cream and Coconut Cupcakes are soft, sweet and absolutely delicous. When covered with an apricot jam glaze they are quite appealing to the eye too. Just take care to ensure they are fully cooled before storing them in an airtight container to prevent them from collapsing.

Apricot, Sour Cream and Coconut Cupcakes - with Apricot Jam Glaze
INGREDIENTS:
220g self-raising flour
45g desiccated coconut
125g butter
230g caster sugar
2 eggs, lightly beaten
250mL apricot nectar
125g sour cream
1 tin apricot halves in juice (or 20 apricot halves)
80g apricot jam

METHOD:

Preheat oven to 180 degrees celcius and line muffin tin with paper cases
Sift flour into abowl
Add coconut.
Melt butter and sugar in a saucepan over low heat until sugar has dissolved. Remove from heat
Whisk egg, apricot nectar aand sour cream in a small bowl.
Add butter and egg mixtures to floue mixture.
Stir with a wooden spoon until combined.
Spoon mixture into muffin cases, placing an apricot half, cut side up, on top of each.
Bake for 15-20 minutes or until a skewer comes out clean.
Transfer to wire rack to cool.
Heat jamm in a small saucepan until melted. Brush a little jam over each cupcake.

Makes 20

Enjoy!

Just desserts here 

Wednesday, September 12, 2012

Chocolate Walnut Cake Recipe (LF) (GF)

Chocolate Walnut Cake is soft, moist, crumbly and delicious. Full of chocolate bits, walnut pieces and covered in rich chocolate icing, this cake is indulgent yet surprisingly light. With the omission of standard flour in favour of rice flour and almond meal, this recipe is gluten-free as well as lactose-free. Just be sure to use gluten-free and lactose-free dark chocolate.


Chocolate Walnut Cake
INGREDIENTS:

140g margarine
140g caster sugar
85g dark chocolate (lactose-free, gluten-free), coarsely chopped
3 eggs, beaten
30g ground almonds
pinch of salt
100g rice flour
1 heaped teaspoon of baking powder
115g walnuts, roughly chopped
1tbsp strong black coffee

Icing Ingredients:
100g dark chocolate (lactose-free, gluten-free)
30g margarine
Walnut halves


METHOD:

Preheat oven 180 degrees celcius.
Cream margarine and sugar until pale and fluffy.
Slowly add eggs, flour, almonds and salt. Mix briefly.
Fold in baking powder, chopped chocolate, chopped walnuts and coffee.
Spoon mix into a greased and lined 20cm square or round springform pan.
Bake for 30 minutes or until firm to touch.
Cool inside tin for 15 minutes. Then lift out, remove the base with lining and put onto wire rack until cold.
Peel off lining.
Melt chocolate for icing with margarine in a bowl in the microwave. Stir until smooth.
Spread icing over cake and top off with walnuts placed around the edge.
Cut and place in airtight container until required

Enjoy!

Just desserts here 

Saturday, September 1, 2012

Dark Chocolate Cupcakes Recipe (LF)

Chocolate cupcakes are just perfect for afternoon tea or as a treat when feeling a little peckish. These are made with lactose-free dark chocolate and lactose-free margarine then topped off with sprinkles and dairy-free chocolate butter cream icing (the recipe for which can be found here). Making them a special treat for my lactose intolerant partner.


Chocolate Cupcakes with Sprinkles and Dairy-Free Butter Cream Icing
INGREDIENTS:

150g margarine
200g dark chocolate (lactose-free)
185g self-raising flour
30g cocoa powder
285g caster sugar
2 eggs, lightly beaten
185ml water
Dairy-free Chocolate Butter Cream Icing

METHOD:

Sift flour and cocoa into a large bowl; set aside.
In a heat proof bowl, add margarine and chocolate.
Sit bowl over a saucepan of simmering water, making sure the bowl does not touch the water.
Stir the mixture constantly until melted.
Combine margarine and chocolate mixture with sugar, eggs and water. Mix well.
Add chocolate mixture to flour and cocoa.
Stir until well combined.
Heat oven to 180 degrees celcius.
Line 20 standard muffin holes with paper cases.
Divide mixture evenly among the cases.
Bake for 20-25 minutes, or until a skewer comes out clean.
Transfer onto a wire rack.

Once cooled, ice with butter cream icing and top off with sprinkles or chocolate hail.

Makes 20.

Enjoy!

Just desserts here 

Sunday, July 15, 2012

Chocolate Almond Torte Recipe (GF)

This Chocolate Almond Torte is a gluten free, moist and irresistable dessert. Served cold with cream it's perfect to accompany a great cup of coffee with friends. For a more decadant dessert, create a Sachertorte by brushing the surface with 2 tablespoons of apricot or raspberry jam then a generous spread of chocolate icing. To ensure it is gluten free be sure to check that the chocolate you use does not use gluten flours as a thickener.

Chocolate and Almond Torte
INGREDIENTS:
310g dark chocolate
115g margarine
100g caster sugar
100g ground almonds
5 eggs (size 6), separated
55g corn bread crumbs

METHOD:
Preheat oven to 180 degree celcius.
Melt chocolate in microwave until just melting; stir until smooth.
Cream margarine and sugar together until well combined.
Mix in egg yolks, ground almonds and bread crumbs.
Fold into mixture the melted chocolate.
Whisk egg whites until dry.
Fold egg whites into mixture.
Pour mixture into and greased and baking paper lined 23cm springform tin.
Bake for 40 minutes.
Remove from oven and leave to cool for 45 minutes.
Remove from tin and dust with icing sugar.

Enjoy!

Just desserts here


Saturday, July 7, 2012

Strawberry-Boysenberry Charlotte Russe Recipe (GF)

Charlotte Russes look awesome, taste awesome yet they are simple to make, especially if you use store bought sponge fingers. Filled with fruit flavoured bavarian cream, this dessert is delightful to the tastebuds. If using home-made sponge fingers (see my post on Gluten-free sponge fingers recipe) I suggest the fingers be piped with ~5mm space between them so they merge into another when baking making the charlotte russe casing easier to make and handle.

INGREDIENTS:
36 (10 x 2.5cm) gluten free sponge fingers
(you can use standard sponge fingers if gluten-free is not required)

For the strawberry Bavarian cream filling:
3 cups full cream milk milk
1 1/4 cups sugar
2 vanilla beans, split and scrap seeds reserving both
1/2 tsp salt
1/4 cup plus 2 tbsp Grand Marnier
15g unflavored gelatine
10 large egg yolks
500g frozen strawberries, thawed and puréed (2 cups of purée)
2 cups cold heavy cream

For the Boysenberry glaze: 
2 cups fresh or frozen boysenberries (about 200g)
1/2 cup sugar
3 tbsp plus 2 tsp water
1/2 tsp unflavored gelatine

METHOD:
For the sponge finger collar:
Make a collar out of lunchwrap by folding in half lengthwise, it needs ot be long enough to line the inside of a 9-inch springform pan. Line the springform pan with it, placing the folded end down. Secure the ends with a paper clip.
Line the pan with the sponge fingers starting along the bottom. Place the sponge fingers sugar-side up on the bottom of the pan, breaking them as needed to form a single, tightly packed layer whilst leaving a 5-6 mm space along the edge of the pan (the sponge fingers around the outer edge will need to fit snugly into this space).
Line the inner ring of the pan with sponge fingers, standing them upright with the sugar side facing out. Loosen the lunchwrap collar as needed to keep the sponge fingers standing upright.
Fill any gaps at the bottom of the pan with broken pieces of sponge fingers so that the bottom is completely covered.
They need to fit snugly next to each other, leaving no crevices on the bottom or sides, or the Bavarian cream will leak out

For the strawberry Bavarian cream filling:

Combine milk, sugar, vanilla seeds, vanilla pods, and salt in a large saucepan
Bring to a simmer over high heat, stirring occasionally until the sugar dissolves, about 7 to 8 minutes.
Meanwhile, pour the Grand Marnier into a small bowl and sprinkle the gelatine evenly over the surface; set aside.
Whisk the egg yolks in a medium heatproof bowl until smooth, about 1 minute.
Set a fine-mesh strainer over a large heatproof bowl; set aside.
Remove the milk mixture from the heat and slowly pour about 1 cup into the egg yolks, whisking constantly until smooth.
Pour the milk-egg mixture back into the pan and cook over low heat, stirring constantly, until the custard thickens slightly and coats the spoon, about 3 to 5 minutes. (When you draw your finger across the spoon, it should make a mark through the custard, which should not run back in on itself.)
Remove the custard from the heat and pour it through the strainer (don’t press on the solids); discard the contents of the strainer.
Whisk the gelatine mixture into the custard until dissolved and the mixture is smooth, about 2 minutes; set aside.
Prepare an ice water bath by filling a large bowl halfway with ice and water.
Place the custard over the ice water bath and stir often until it’s cooled to room temperature, about 15 minutes.
When the custard is cooled, add the strawberry purée and whisk until combined.
Pour the cream into a clean large bowl and whisk to medium peaks.
Add all of the whipped cream to the bowl of strawberry custard.
Using a rubber spatula, fold in the whipped cream until evenly combined and no streaks of strawberry or whipped cream remain, scraping the bottom of the bowl as necessary to incorporate the custard. Pour the strawberry Bavarian cream into the prepared pan.
Refrigerate uncovered until set, at least 4 hours, then prepare the glaze.
(Do not make the glaze ahead, or it will set up and be unpourable.)
For the boysenberry glaze:

Set a medium-mesh strainer over a small bowl and set aside.
Combine the boysenberries, sugar, and 3 tablespoons of the water in a small saucepan and bring to a boil over medium-high heat.
Reduce the heat to medium low and let simmer, stirring occasionally, until the berries are soft and starting to fall apart and the liquid has thickened slightly, about 10 minutes.
Remove the pan from the heat.
Pour the remaining 2 teaspoons of water into a small bowl and sprinkle the gelatine evenly over the surface; set aside.
Pour the cranberry mixture into the strainer. Using a rubber spatula, push on the boysenberry solids and scrape the underside of the strainer until all of the liquid is extracted; set the liquid aside and discard the contents of the strainer.
Whisk the gelatine mixture into the boysenberry mixture until dissolved and smooth.
Set aside to cool to room temperature, about 15 minutes.
Pour the cooled glaze over the surface of the charlotte russe, tilting the pan as needed so that the entire top surface is covered.
Refrigerate uncovered overnight.
To serve, unlock and remove the outer ring of the springform pan and discard the lunchwrap collar. Cut the charlotte russe into slices and serve immediately.
If displaying the dessert before serving, tie a decorative ribbon around the sponge fingers.
The charlotte russe can sit at room temperature for about 30 to 40 minutes before it needs to be rechilled.

Enjoy!

Just desserts here 

Friday, June 29, 2012

Gluten Free Sponge Fingers Recipe (GF) (LF)

Gluten free sponge fingers or lady fingers are quite easy to make and easy to eat too!!! I used this recipe to make a Strawberry Charlotte Russe for a friend's 30th birthday. Try these, they are full of awesome-ness.  This recipe is an adapted version of Wheat free mom's.

Gluten Free Sponge Fingers

INGREDIENTS:

1/2 cup cornflour (maize)
1/2 cup potato flour
3/4 tsp baking powder
1/2 tsp xanthan gum
3 eggs, separated
1/2 cup sugar
1/2 tsp vanilla essence
2 tsp water
1/4tsp salt
1/4 tsp cream of tartar

METHOD:
Mix the cornflour, potato flour, baking pwder, and xanthan gum in a bowl.
Beat egg yolks, sugar, vanilla, and water, in a separate bowl, until smooth.
Whip egg whites with salt and cream of tartar until they form soft peaks.
Fold dry ingredients into yolk mixture fully and then fold in whites until fully combined.
Fill a ziploc bag with the mixture and cut off corner diagonally to use as a piping bag - or use a piping bag.
Bake for 6-8 minutes or until golden at 180 degrees celcius.
Remove from oven and leave until cool to touch.
Transfer to a wire rack to cool competely
Store in an air tight container if not using straight away.

Enjoy!

Just desserts here 

Tuesday, June 26, 2012

New York Cheesecake Recipe

New York Cheesecake is another well-known favourite. Many variations have been created but I reckon this one is pretty good. Served with fresh raspberries, berry couli and chocolate cream, this cheesecake is just irrisistably delicious!

New York Cheesecake


INGREDIENTS:
250g digestive biscuits
65g unsalted butter, melted
1kg cream cheese
2 Tbsp milk
350g caster sugar
3 Tbsp flour
finely grated zest of a lemon
finely grated zest of an orange
5 eggs
2 egg yolks
1 vanilla pod

METHOD:
Preheat oven to 180 degrees celcius
Put biscuits into a food processor or blender and process until they finely crumbed.
Add butter and mix well.
Press biscuit mixture into the bottom of a 22cm round springform pan.
Place onto a baking tray and bake for 12 minutes then remove from oven to cool.
Increase oven heat to 220 degrees celcius.
Using electric beaters, beat together cream cheese, milk, flour, sugar and zests until smooth.
Add eggs one at a time, beating them into the mixture using a low speed.
Beat in the egg yolks.
Split the vanilla pod, scrap out the seeds and beat into the mixture.
Beat until smooth, Be sure to scrap the sides of the bowl to ensure the misture is thoroughly combined.
Pour mix into springform pan on top of biscuit base.
Bake in oven for 12 minutes.
Turn down oven temperature to 100 degrees celcius and continue baking for 1 hour.
Turn off oven and leave to cool in the oven for 1 hour with the oven door ajar.
Remove from the oven and place the springform pan on a cooling rack to cool.
Place in refridgerator for at least 6 hours before serving
Carefully remove cheesecake from springform pan and cut using a heated knife.
Serve with  berry couli, fresh raspberries and chocolate cream.

Enjoy!

Just desserts here 

Tuesday, June 12, 2012

Feijoa Cake Recipe

Lovely and moist, this feijoa cake recipe topped off with chocolate butter cream icing it's absolutely delicious. The addition of sultanas and cinnamon compliments the fruitful feijoas perfectly giving a great feijoa dessert.
Feijoa cake with chocolate butter cream icing

INGREDIENTS:
300g self-raising flour
1½ teaspoons ground cinnamon
½ teaspoon salt
110g brown sugar
110g raw sugar
50g sultanas
110g butter, melted
2 large eggs, lightly beaten
175ml milk
250g feijoas, peeled and chopped
Chocolate butter cream icing (see Dairy-free Chocolate Butter Cream icing for a great recipe)

METHOD:
Preheat oven to 180 degrees celcius.
Lightly grease and line a 20cm round or square cake pan with baking paper.
Sift flour, cinnamon and salt into a bowl.
Stir in the sugars and sultanas.
Mix in the butter, eggs, milk and feijoas.
Beat until smooth.
Pour the mixture into the prepared pan.
Bake for 35-45 minutes, or until the cake springs back when lightly pressed.
Turn onto a wire rack to cool.
Once cool, frost with butter cream icing.

Enjoy!

Just desserts here 

Monday, June 11, 2012

Dairy-Free Chocolate Butter Cream Icing Recipe (LF) (GF)

This Dairy-free Chocolate Butter Cream Icing Recipe is a variation of that posted by The Dairy-Free Diva which can be found here. Finally, I can now make pretty cupcakes for my partner who is lactose intolerant :). Can't wait. Very excited! Lots of thanks goes out to Stephanie Colman: The Dairy-Free Diva for the recipe. I tried out my first batch on top of my feijoa cake; it was delicious and very easy to make.

INGREDIENTS:
3/4 cup cold margarine
2 2/3 cup icing sugar
6 tbsp cocoa powder
2 tsp vanilla essence

METHOD:
Put margarine into a bowl.
Sift in icing sugar and cocoa powder.
Mix well.
Mix in vanilla essence with a wooden spoon.
Over a shallow sink of warm water, beat the mixture until it forms into a spreadable consistency.
Remove bowl from sink and your dairy-free butter cream icing is ready to use.

TIPS:
  • After you add the vanilla essence, the mixture will still seem quite dry
  • Make sure the water in the sink is not hot as the mixture will split if heated too far
  • After you start forming a thick icing consistency, electric beaters can be used to get a smooth consistency. 
Enjoy!

Just desserts here 

Sesame Balls Recipe - 煎堆 Jin Deui (GF) (LF)

Jin Deui or Sesame Balls are sweet, soft crunchy and gooey at the same time. Traditionally filled with red bean paste they are considered an 'acquired' taste. Here I've opted for a filling of sugar and peanuts that I think many would find quite delicious. An added bonus is this recipe is both lactose and gluten free. By the way, despite the name, glutinous rice flour does not have an gluten in it!

Sesame Balls (Jin Deui)

INGREDIENTS:
2 cups glutinous rice flour
1/2 cup sugar
1/4 cup brown sugar
1 tsp apple cider or carbonated apple juice
3/4 cup warm water
1/2 cup sesame seeds
2 Tbsp chopped roasted and salted peanuts
1 Tbsp sugar

METHOD:
Sift flour into a bowl, add first two measures of sugar and mix well
Stir in water and apple cider to form a smooth dough
Add flour to get to a smooth dough-like consistency, it should hold its shape when left to sit whilst still soft.
Combine peanuts with third measure of sugar.
Divide dough into 20 portions
Take a portion and roll into a ball, make an indent in the centre and fill with peanut mix.
Enclose the filling inside the dough, roll in warm water and then in sesame seeds
Repeat with remaining portions
Fry in hot oil over a low heat until they puff up to double their size and have a crispy crust.

TIPS:
  • Make sure the depth of oil will allow the balls to float when doubled in size, otherwise you may end up with a more 'golden' side if allowed to rest on bottom
  • When you first put the balls into the oil, keep them moving around until they start puffing up, this is to ensure they hold their circular shape, try pressing the balls into the edge of the pot or wok holding the oil if required.
  • Once puffed up they will start to float so keep turning them to get even colouration
  • Fry them in batches of 3 or 4 to avoid accidentally burning or creatng flat looking sesame balls.
Enjoy!

Just desserts here 

Sunday, June 10, 2012

Chocolate Wassant Recipe

Chocolate wassants have a tasty crust that conceals a soft sweet bread swirled with chocolate. Great as a snack as well as an after dinner treat. This recipe is similar to that found at My Little Space with a couple of small changes and added details. The recipe for the chocolate paste used can be found here or for a version that is made from cocoa powder try the recipe found here

Chocolate Wassants - Fresh out of the oven

INGREDIENTS:
Starter Dough:
225g    flour
1 tsp    dried yeast
100ml    luke-warm water

Main Dough:
225g flour
100g  sugar
1 egg
60ml   water
70g  butter, melted
1 tsp  salt

1 batch of Chocolate Paste

METHOD:
For starter dough, sift flour into a bowl. Dissolve yeast in water and add to flour, mix/knead until just combined. Cover and leave in a warm place for about an hour or until doubled in size.
For main dough, sift flour into a bowl. Add sugar, egg, water, butter and salt.
Break risen starter dough into pieces and add to main dough.
Mix to form a soft dough, cover and leave in warm place for about an hour or until doubled in size.
On a floured surface, knead dough until smooth then roll out dough to a size that is larger than your chocolate paste.

Chocolate Paste in the middle of Wassant dough

Place chocolate paste in middle, then one third either side into the middle, then in half.

Folding one third into the middle form either side
Folding in half
Rolling out the dough after folding
Roll out to about 20 x 30 cm then fold and roll out again.
Folding one third into the middle

Folding the one third from the other side into the middle

Folding in half

Do this folding and rolling at least one more time.
Then roll out to 30 x 40 cm rectangle and cut into triangles.
Roll up dough like swiss rolls and place on a baking tray lined with baking paper
Rest for 30-40 minutes
Chocolates wassants ready to go in the oven
Brush rolls with egg wash and bake at 180 degrees celcius for 20 minutes or until brown.

Chocolate Wassants

Enjoy!

Just desserts here

Friday, June 8, 2012

Chocolate Paste Recipe

Inspired by My Little Space I decided to try making home made chocolate paste. This version is based on the recipe found here just with a couple of little changes and added details. Easy to make, just gotta have a little patience! Is perfect for making Chocolate Wassants.

Chocolate Paste - Ready to be bagged and refrigerated

INGREDIENTS:
2 egg whites
100g  sugar
50g  flour
10g  corn flour
2 tbsp  milk
150g  chocolate, chopped.

METHOD:
Combine egg whites, sugar, flour, cornflour and milk in a saucepan. Mix well
Add chocolate and heat mixture on a very low heat until chocolate has melted.
Heat mixture on a low-medium heat until thickened, stir continuously.
When mixture is a paste like consistency, remove from heat and leave to cool.
Transfer to a plastic bag and refrigerate for at least an hour until set.

Chocolate Paste: Ready for use in Chocolate Wassants after an hour in the fridge
TIPS:
  • Make sure you melt the chocolate into the mixture on a very low heat; alternatively you could melt the chocolate in the microwave first then add to the rest of the mixture.
  • Be patient when waiting for the mixture to thicken; too much heat and you're running the risk of burning or splitting the mixture

Enjoy!

Just desserts here 

Monday, May 21, 2012

Chocolate and Pistachio Bavarois (GF) Recipe

Full of chocolate, rich and delicate with a soft, smooth texture and intriguing crunchy bits; this is definitely one of those desserts that will delight most tastebuds. Orange Marsala Sauce and a few orange segments on the side are a must to cut through the richness of the bavarois.

This dessert is so good, my partner keeps helping himself despite his lactose intolerance and it even converted a 'mousse-like' desserts hater. I have yet to find someone who dislikes this one!

Warning: I have been told that some brands of chocolate use gluten flours as a thickener so you may like to check the ingredients of the chocolate you intend to use if you are specifically making it gluten free.

Chocolate and Pistachio Nut Bavarois with Orange Marsala Sauce and Orange Segments
INGREDIENTS:
255g dark chocolate
140g margarine
4 eggs
55g caster sugar
100g Pistachio nuts
A pinch of salt

METHOD:
Brush ramekins with sunflower oil and line with a circle of baking paper.
Melt chocolate with margarine in the microwave unitil just soft. Stir the mixture until smooth
Separate eggs and put egg whites into a large bowl. Place egg yolks into a food processor or blender with the sugar and beat until thick and creamy. Stir this into the chocolate mixture, followed by the nuts.
Beat the egg whites until soft peaks form. Fold them into the chocolate mixture using a metal spoon.
Divide mixture into prepared ramekins.
Cover with clingfilm and refrigerate for at least 4 hours or until firmly set.

Just prior to serving, remove cling film and dip the ramekins briefly in hot water to loosen the bavarois, then turn them out onto the centre of a plate. Serve with Orange Marsala Sauce and orange segments on the side.

Enjoy!

Orange Marsala Sauce (GF) (LF) Recipe

This sauce goes well with decadant chocolate desserts such as chocolate and pistachio bavarois where a sweet fresh sauce is needed to cut through an intense richness. Made with eggs, it is like a thin custard. The spike of Marsala intensifies the orange flavour and aroma. If you don't have Marsala, dry sherry can be used instead.

INGREDIENTS:
4 eggs, beaten
200g caster sugar
Grated zest of 1 orange
140 mL fresh orange juice
55g Margarine
60 mL Marsala

METHOD:
Put eggs, sugar, orange zest and orange juice into a blender or food processor and process for a few seconds.
Transfer toa non-stick saucepan and cook over a low heat until mixture thickens. Keep stirring to prevent sticking but do not allow the mixture to boil as it will separate.
Once thickened, quickly beat in the margarine and marsala.
Transfer to a bowl or jug and allow to cool, then cover and chill until required to serve.

Enjoy!

Tuesday, May 15, 2012

Which One Next???

Tossing up between:

Chocolate & Ginger Truffle Tart which is just yum and I have all I need already.

Or take on the real challenge of a Chocolate & Pistachio Bavorois with Orange Sherry Sauce that's gluten free and lactose free - the search is on for good enough ingredients now!

Either will be made in the next few days - so long as I can convince enough people to try it...shouldn't be too hard! :)

Keep cooking and love desserts.

Enjoy!

Friday, May 11, 2012

Walnut Torte (LF) (GF) Recipe

Just biscuit crumbs, sugar, walnuts and eggs. Great as a simple dessert or along side a good old fashioned cup of tea. Serve it "rustic" with a dollop of cream, a few berries and a sprinkling of chopped nuts. Good for satisfying the sweet tooth. Omit the cream on top and it is lactose free. Can also be made gluten free by using gluten free biscuits.

Walnut Torte ... Spectacular!!!
I usually use plain biscuits and use my bullet blender to create crumbs, making sure the crumbs are as fine as possible. The same with the walnuts, best to get them as fine as possible. If you're really adventurous you could try other flavours like ginger or chocolate. Be good to hear how that goes if you try.

INGREDIENTS:
125g walnuts
1/2 cup biscuit crumbs
1 cup sugar
3 eggs

METHOD:
Preheat oven to 160 degrees celcius and grease or line a 20cm cake tin or rectangular tin.
Using a blender or food processor, blend the walnuts and half the sugar until finely crumbed. Add the remaining sugar.
Whisk eggs together until pale and thick.
Carefully fold the biscuit crumbs, walnuts and sugar into the eggs mixture until just combined.
Pour mixture into prepared tin.
Bake for 30-40 minutes until the torte is springs back when lightly touched.
Remove from oven and rest for 10 minutes before removing from tin.
Cut and serve with a dollop of cream, fruit and chopped nuts.

Enjoy!

Walnut Torte - Made with gluten free biscuits

Saturday, May 5, 2012

Chocolate and Raspberry Tart Recipe


This Chocolate and Raspberry tart is a rich and decadant dessert. I suggest serving this with fresh fruit on the side to help 'cut through' the richness. The biggest challenge is definitely making and rolling the pasrty out but I've blogged previously on the recipe I use and how to make the process of making Pate Sablee more bearble. (see Pate Sablee Post Here) Enjoy!

Chocolate and Raspberry Tart - Presented with all its glory

I used 70% cocoa solids chocolate but anything from 45% to 74% can be used. Depends on what you like I guess. If using frozen raspberries, make sure they are well defrosted to prevent the pastry getting all soggy.

INGREDIENTS
280g Pate Sablee (see Pate Sablee Post Here)
200g fresh raspberries (or frozen ones, defrosted and well-drained)
250mL whipping cream
200g dark chocolate, in small pieces
25g liquid glucose
50g butter, in small pieces

METHOD:
Roll out pastry to ~3mm thick and use it to line a 22cm tart tin. Put onto a baking tray and place in fridge for 20 minutes.
Preheat oven to 190 degrees celcius, prick pastry base and bake blind for 20 minutes. Remove baking blind material, lower oven to 180 degrees celcius and bake for another 5 minutes.
Transfer to a wire rack and leave until cool enough to handle then lift off tart ring.
When cold, arrange raspberries in the pasrty case.
Bring cream slowly to the boil on a medium heat. Remove from the heat and add chocolate. Use a whisk to mix it in.
Add the glucose, and when smooth, add the butter a little at a time.
Pour mixture over raspberries to fill pastry case. Leave to cool then chill in fridge for at least 2 hours, before serving.
Use a very sharp knife dipped in hot water to cut the tart, wiping between each slice.
This tart is best cut straight out of the fridge but best served once it has rested for 5-10 minutes at room temperature.

Serve with a dollap of cream and fresh fruit on the side.

Enjoy!

A tart in the making
One finished tart

The first piece


Friday, May 4, 2012

Pate sablee (sweet tart pastry - french) Recipe

My most favourite of the pastry bases crispy, sweet, soft and crumby all at the same time. Hard to work with but a few tricks and it works out fine. This is a french sweet tart pastry and it's delicious!

Here's the recipe I use and a few tips to help get it right

You can either be a real pastry chef and make this on a clean flat surface or if you're a little messy like me, in a big bowl.

INGREDIENTS:
250g flour, sifted
200g butter, cut into small pieces
100g icing sugar, sifted
2 egg yolks
pinch of salt

METHOD:
Combine together the flour, icing sugar and salt. Add butter and rub butter into flour using your fingers until it resembles breadcrumbs. Add the egg yolks and use a fork to slightly combine into mixture. Using your hands mix and press the mixture together until it resembles a soft smooth round of dough.Wrap in cling film and place in the fridge.

TIPS:
  • You can use the pastry straight away; but it is always best to rest pastry in the fridge for at least 30 minutes; this allows the gluten to do its thing and prevents the pastry from shrinking when cooking or acting like elastic when rolling it out.
  • Roll the pastry out between two pieces of non-stick baking paper to prevent over use of flour, stickng to the rolling pin/rolling surface and your hands from warming the pastry to much.
  • Use drops of water on each corner to get the bottom piece of paper to stick to the work surface and prevent the pastry and paper from shifting around whilst rolling.
  • When rolling it out, try not to handle it too much. Also try to work quickly and in a cool place. This is because the pastry has a high butter content so the more the pastry warms the sticker and softer it gets and the harder it is to work with.
  • Before you put your pastry into a tart tin. Carefully peel off one of the pieces of paper and place exposed side down into tin. You can use the reamining piece of paper, that is still stuck to the now top of the pastry, to manipulate pastry into shape of tin before peeling off then re-using to hold baking blind material.
  • Or, if you don't mind a few creases in the pastry case, you can use one of the pieces of paper as a liner for tin and place the pastry straight into the tin with paper attached underneath.
 Hope that all made sense, if not please let me know.

Sunday, April 29, 2012

Lemon Meringue Pie (LF) Recipe

Lemon Meringue Pie is a classic favourite. This recipe can be made using margarine so it's a lactose free dessert.
A photo of the latest one I've made 4/5/2012
I've made it successfully many times and here's the recipe.

Pastry:
1 2/3 cup flour
1/2 tsp salt
1/4 sugar
10 tbsp butter/margarine
1 tsp vanilla
2 tsp water
2 egg yolks

Filling:
1/2 cup lemon juice
2 tsp lemon zest
3 egg yolks
1/3 cup sugar
1/4 cup corn flour
1 Tbsp butter/margarine
3/4 cup water

Topping:
5 egg whites
1/4 cup caster sugar
1/4 tsp vanilla

To Make:

Heat oven on Bake to 180 degrees celcius

Pastry: Sift flour, salt and sugar in to a bowl. Add butter/margarine and press into breadcrumbs. Add vanilla, water and egg yolks. Mix together using a fork until just combined then use hands to knead in to a soft smooth ball of dough. Place in fridge for at least 30 mins. Roll out pastry to about 4mm thickness and line a flan tin (can be ceramic flan dish). Bake blind for 20 minutes. Remove baking blind material and bake for 1 minute. Meanwhile make filling and topping

Filling: Combine lemon juice, lemon zest, sugar, water and cornflour in a pot. Heat on moderate heat until thick and smooth, stirring constantly. Remove from heat and stir in butter/margarine and egg yolks until combined. Pour into cooked pastry case.

Topping: In a large bowl, whisk together vanilla and egg whites until soft peaks form (not dry) form. Whisk in sugar tablespoonfuls at a time. Spread evenly over the top of filling in pastry case and bake for 10 minutes.

Enjoy.

   Special Lemon Meringue Pie made for Wade and Trystan's double trouble party